Because Neon!
You know that voice in your head thatʼs always saying “you need a neon sign in your living room?” One fine day I was suddenly flooded with resolve to live no longer beneath my privileges. So I made one. We've got this awkward TV nook that leaves a large, blank square of wall above the TV that just pleads for some Hollywood-related artwork. After I lost several eBay auctions on this life-changing Iron Giant poster, I took a spontaneous trip with some friends to Disneyland. And I was dazzled by my first Cars Land experience. The physicists would tell you that those neon lights were reflecting off my skin; to the contrary, they were penetrating, sinking, absorbing into me.
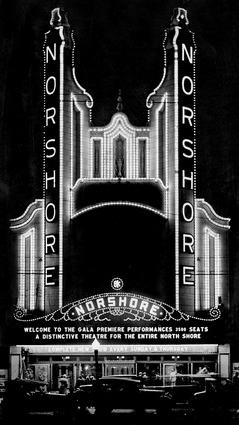
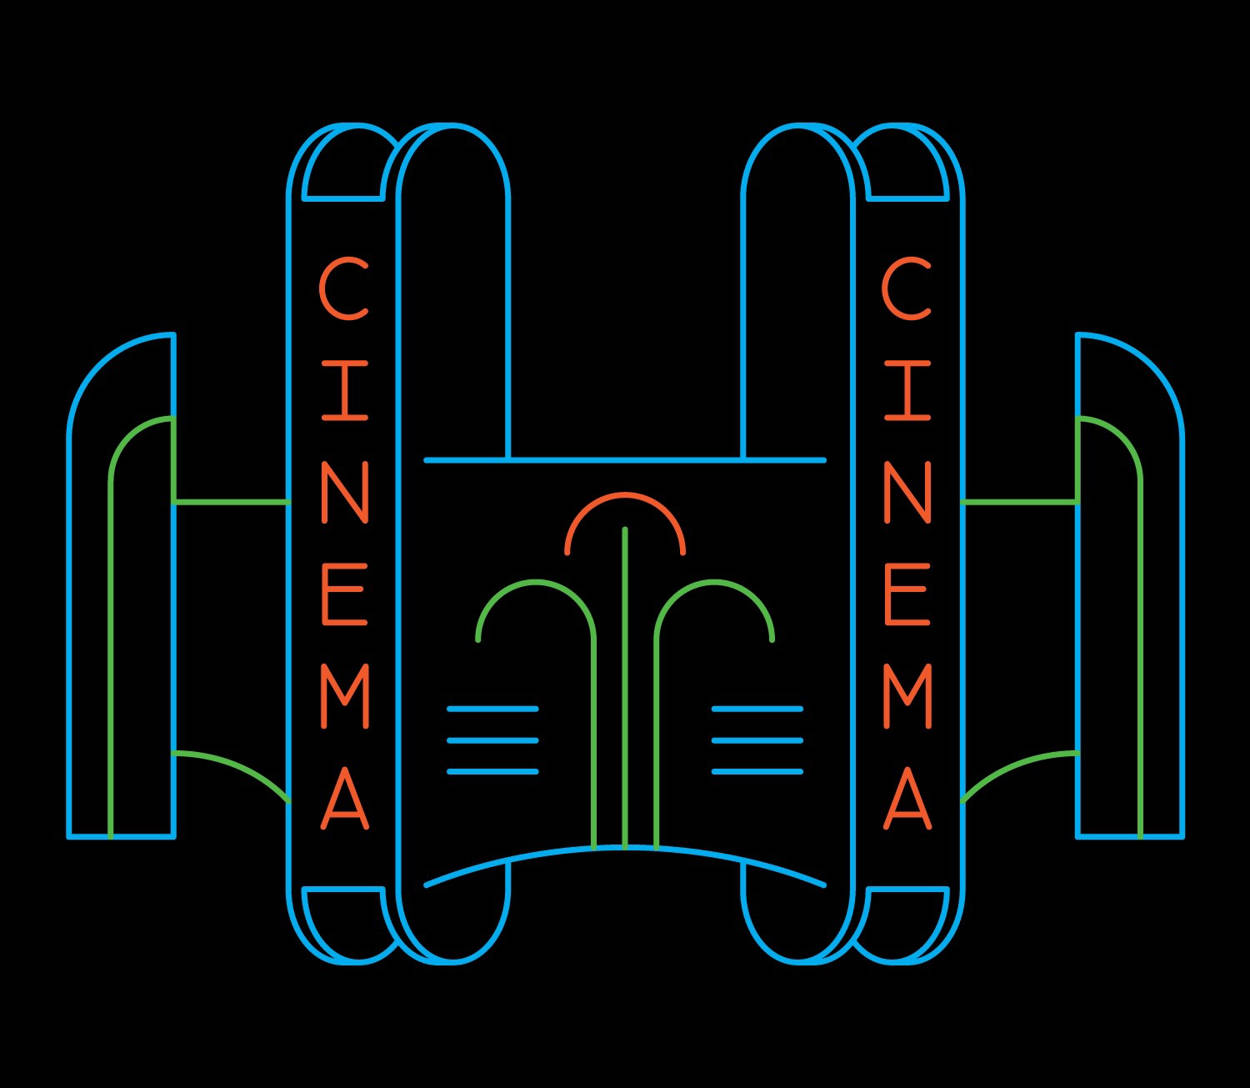
So, I took to Pinterest for some inspiration. Check out my board. It has all the best neon signs. I was delighted to discover through my study, that neon signs borrow heavily from the aesthetics of Art Deco — another of my recent obsessions. I had my epiphany when I ran across images of the late Chicago Norshore theater. It is gorgeous and inimitable. It was then I realized that my sign needed to be designed like a pipe organ: commanding, majestic, vertical, and architectural. Youʼll see its influence at a point in my sketches:
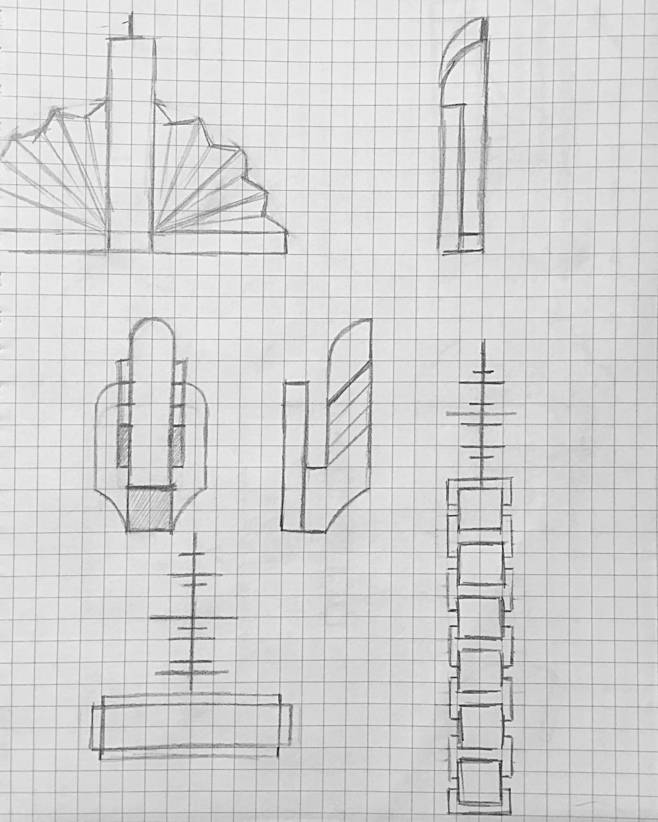
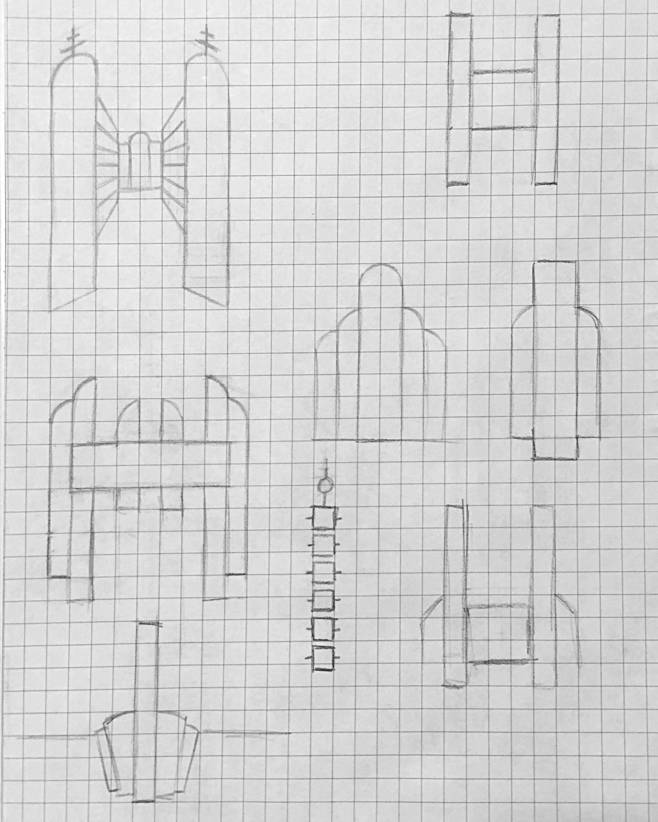
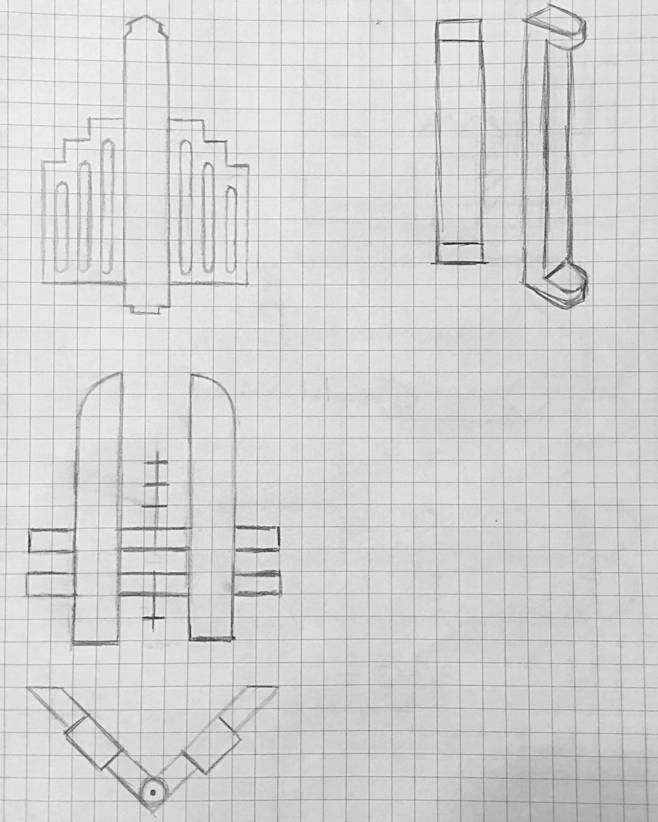
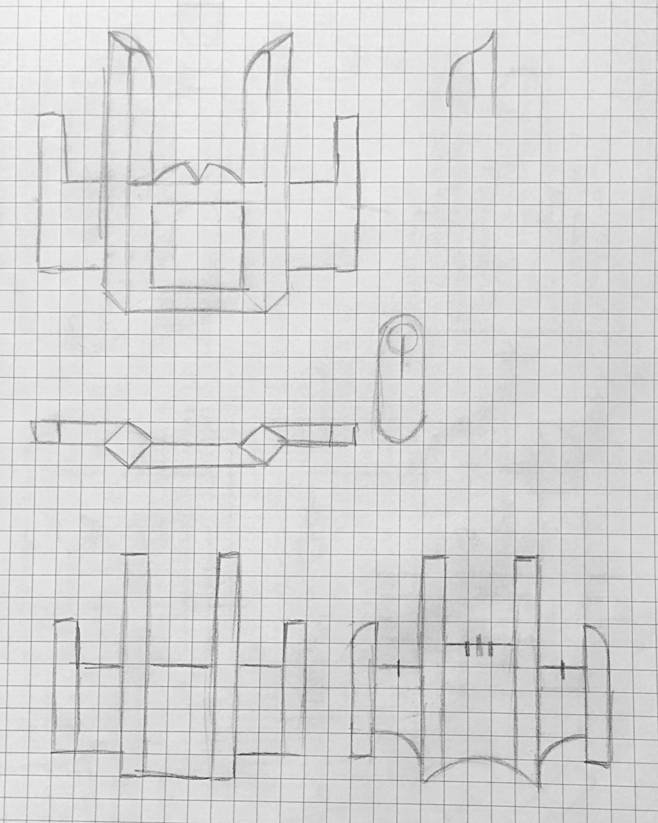
Itʼs hardly a tragedy when I realize I donʼt have the right tools for a piece Iʼve designed. So I bought a band saw, and disc and belt sander combo unit. Because I donʼt have a table saw, I designed the sign around hardwood widths that were already sold standard in stores, which made for some challenging constraints. I had a long list of a lot of different ideas for the squarish center panel like clocks and things. But it became clear that gimmicks like that would detract from the authenticity that I was going for.
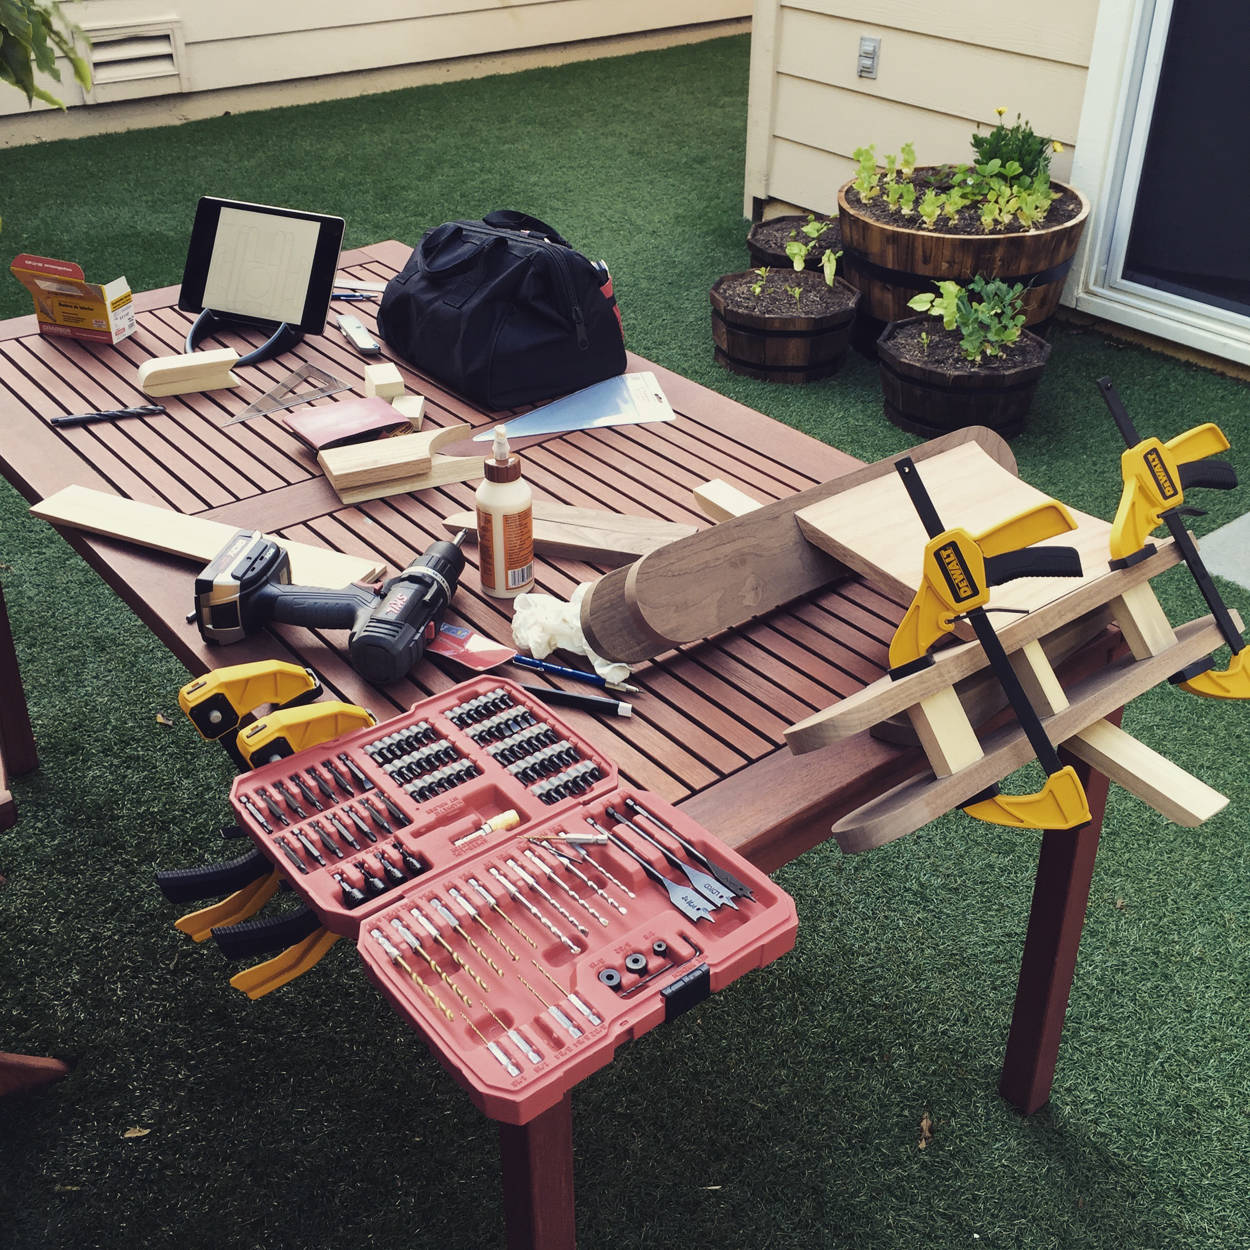
I decided to use slabs of Oak and Walnut for a two-tone effect. The skeleton on the backside, was constructed from Poplar, mostly because it was the cheapest of the hardwoods and wouldnʼt be seen. With the demands of a full time job, it took me a couple weeks to get the woodworking portion finished. My biggest concern was whether my design was going to be sturdy enough. I was nervous that the “wings” might break off. But after securing the joints with both glue and screws it felt like one solid block of wood. Even if I hold it by the narrowest, most “fragile” part of the wing, the full weight of the piece can be fully and safely supported without the slightest wiggle in the joints. I am pleased.

As much as I would have loved to learn to bend my own glass tubes, and pump them full of electrified gasses, Iʼm delighted that I stumbled across this crazy fun material, Electroluminescent Wire (EL Wire). I first ordered the Learn to Solder kit from Cool Neon so I could tinker with it and learn how to solder. After I saw the variation in brightness between colors with my own eyes, I altered my design a bit. Because the green was so much brighter than the blue, I scaled my use of green back by a lot.
I wish Iʼd been able to find a better technique for attaching the wire to the wood. I had elaborate, labor-intensive plans, like drilling a lot of holes and sowing it onto the wood with invisible fishing line, and other impractical ideas. In the end, I just resorted to using super glue. It works well and sets quickly, but because the wire protrudes from the edges, any bumps and snags have a tendency to break the wire away from the wood with some ease. Additionally, the glue and wire have an unusual reaction with each other that leaves a fan of white residue around the joint. In the planning phases, I was so certain Iʼd be able to find some kind of hardware — like a plastic bracket for holding down wire or tubing. But I found no such thing. In that moment I recognized the kind of value custom 3D printed parts could offer. Maybe someday.
One of the less appealing characteristics of EL Wire is the high frequency squeal it bellows forth while itʼs on. The pitch varies with the strength of the power supply and the amount of EL Wire you have attached to it. With all the pieces attached to my sign, it rings at a pretty accurate A♭.
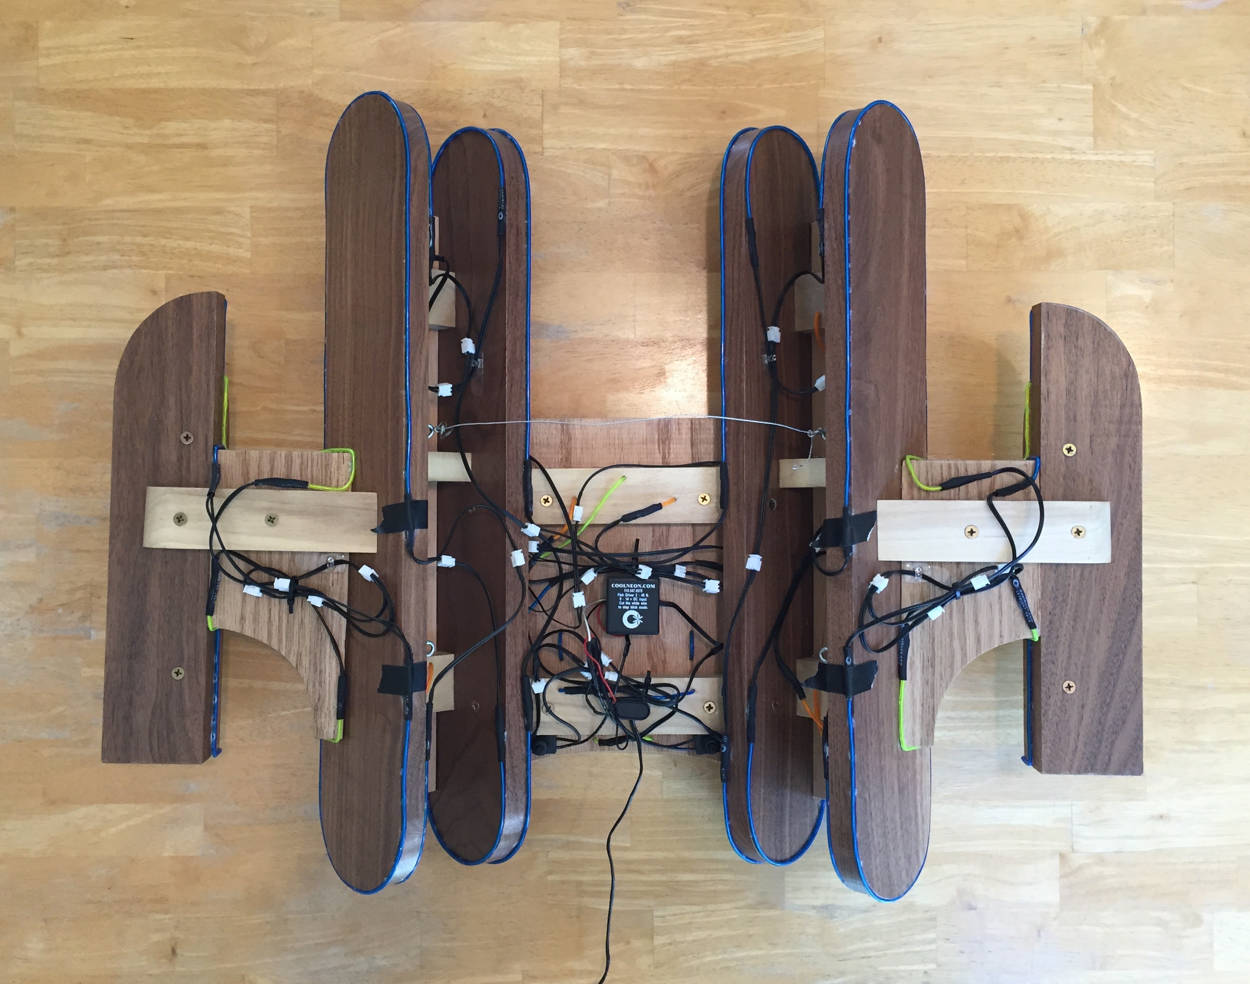
The power supply I ordered came with a built-in blink mode, but itʼs meant to be permanently affixed to one or the other. Severing a certain wire disables the blink. Not to be outsmarted by a silly wire, I decided to buy a second cheap toggle button for blink mode in addition to the one I bought to use as the on/off switch. Iʼm no electrician, and it took some critical thinking, but I can happily report I can, in fact, toggle between blink and steady modes. Despite my best efforts to keep the wires tidy in the back, there are just so many that it looks like a tangled mess. But it is more organized than it appears.
To complete the magic, I plugged it into this fancy iHome SmartPlug. So I can talk into my watch like a secret agent and make the sign turn on.
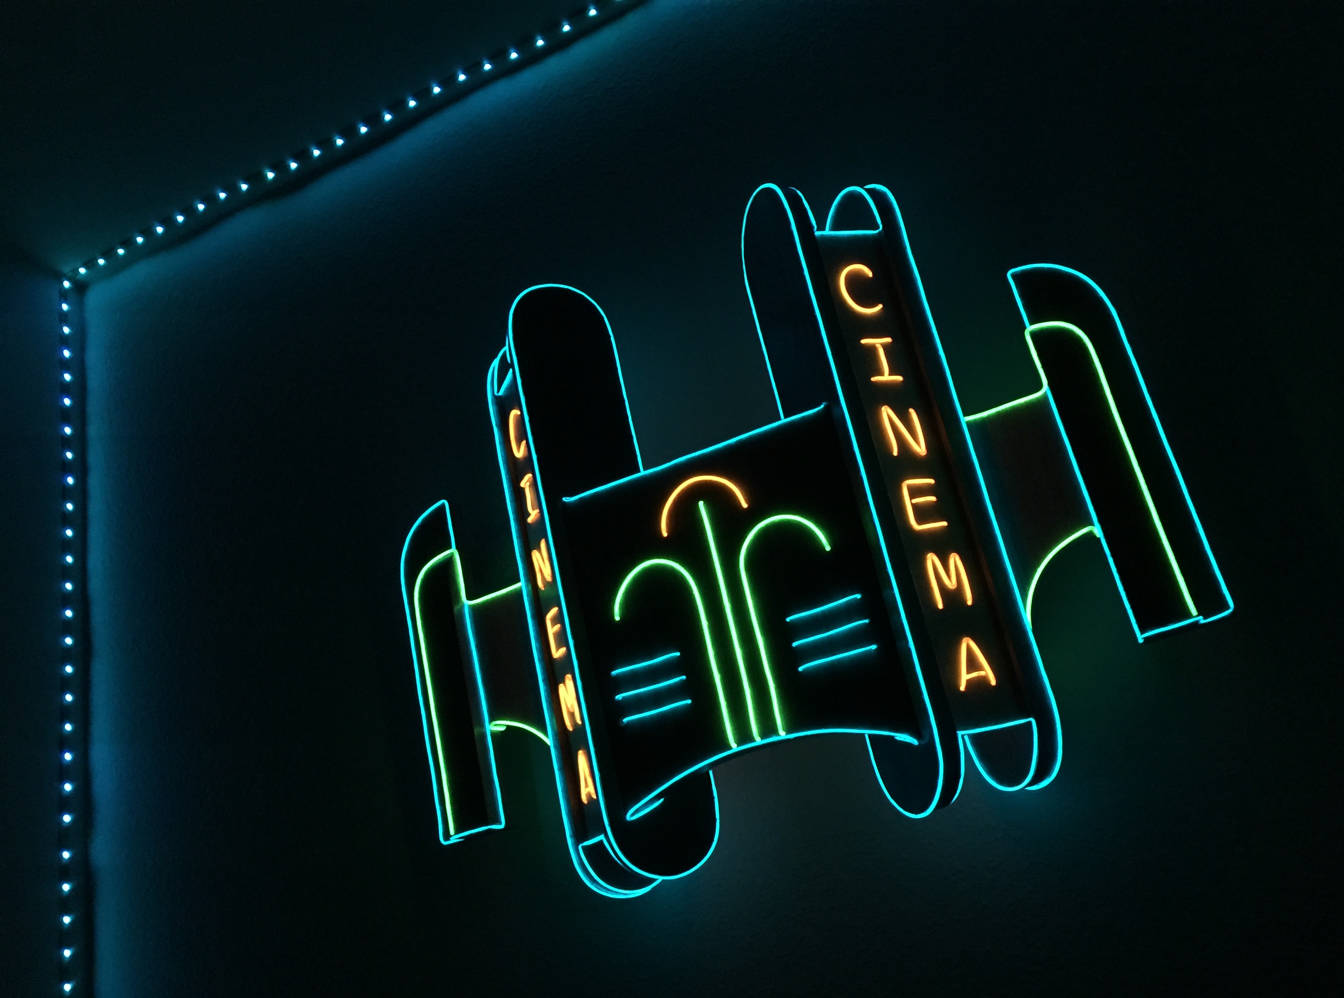
All told, itʼs about 25″ wide, 20″ tall, 10½ pounds, and left me with a materials bill somewhere around $300 (wish Iʼd kept better records) and several weeks of work. Brownie points to my roommates for tolerating, or loathing with a smile, my selfish seizure of the kitchen table during those weeks — I need a woodshop!
So no, youʼre not actually on main street in the 50ʼs, at the movie theater, in a smoky bar or on the Vegas Strip. Youʼre in my living room.